Building applications takes more than just code. Usually your interface will need icons for actions, you may want to add illustrations or branding logos, or perhaps your application will need to load data files to pre-populate widgets. These data files are separate from the source code of your application but will ultimately need to be packaged and distributed with it in order for it to work.
Distributing data files with applications is a common cause of problems. If you reference data files with paths, your application won't work properly unless the exact same paths are available on the target computer. This can get even trickier when packaging applications for cross-platform (Windows, macOS and Linux) use. Thankfully, Qt comes to the rescue with it's resource system. Resources are bundled into Python files which can be distributed along with your source code, guaranteeing they will continue to work on other platforms. You can manage resources through Qt Designer and use the resource library to load icons (and other data) in your apps.
The example application
To demonstrate how to use the resource system, we'll create a simple application that uses two data files -- in this case, two icon image files. However, remember you can package any type of data you like as resources, including data files that your application depends on.
The example below shows a single button, which when pressed changes it's icon.
import sys

from PySide2 import QtGui, QtWidgets

class MainWindow(QtWidgets.QMainWindow):
    def __init__(self):
        super().__init__()

        self.setWindowTitle("Hello World")
        self.button = QtWidgets.QPushButton("My button")

        icon = QtGui.QIcon("animal-penguin.png")
        self.button.setIcon(icon)
        self.button.clicked.connect(self.change_icon)

        self.setCentralWidget(self.button)

        self.show()

    def change_icon(self):
        icon = QtGui.QIcon("animal-monkey.png")
        self.button.setIcon(icon)


app = QtWidgets.QApplication(sys.argv)
w = MainWindow()
app.exec_()
Save this file to your computer as app.py. Run it and you'll see the window appear with the button, but with no icons visible. This is what happens when you create QIcon() objects with files that cannot be found -- they are simply omitted. If you've had issues when packaging your applications, this will be familiar to you.
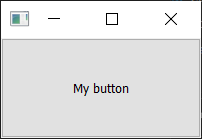 Without the icons available, nothing is shown.
Download and place the animal-penguin.png and animal-monkey.png icons in the same folder as the script, and run it again. These icons are from the Fugue icon set by Yusuke Kamiyamane. Run the application again and you'll see the icons as expected.
![]() With the icons in the same folder as the script, they are now visible.
With the icons in the same folder as the script, they are now visible.
Now the application is working as expected, we'll switch to using the QResource system to load these two files. First we need to define our QRC file and add our resources to it.
This might seem like overkill for 2 files, but as your projects get larger the advantages become clearer!
The QRC file
The core of the Qt Resources system is the resource file or QRC. The .qrc file is a simple XML file, which can be opened in any text editor.
You can also create QRC files and add and remove resources using Qt Designer, which we'll cover later.
Simple QRC example
A very simple resource file is shown below, containing a single resource (a single icon animal-penguin.png we might add to a button).
<!DOCTYPE RCC>
<RCC version="1.0">
    <qresource prefix="icons">
        <file alias="animal-penguin.png">animal-penguin.png</file>
        <file alias="animal-monkey.png">animal-monkey.png</file>
    </qresource>
</RCC>
The name between the <file> </file> tags is the path to the file, relative to the resource file. The alias is the name which this resource will be known by from within your application. You can use this rename icons to something more logical or simpler in your app, while keeping the original name externally.
For example, if we want to use the name penguin.png internally, we can change these lines to.
<file alias="penguin.png">animal-penguin.png</file>
<file alias="monkey.png">animal-monkey.png</file>
This only changes the name used inside your application, the filename remains unchanged.
Outside this tag is the qresource tag which specifies a prefix. This is a namespace which can be used to group resources together. This is effectively a virtual folder, under which nested resources can all be found. With our current structure, our two icons are grouped under the virtual folder icons/.
Save the following file as resources.qrc, this is our resource file which we'll use from now on.
<!DOCTYPE RCC>
<RCC version="1.0">
    <qresource prefix="icons">
        <file alias="penguin.png">animal-penguin.png</file>
        <file alias="monkey.png">animal-monkey.png</file>
    </qresource>
</RCC>
Purchasing Power Parity
Developers in [[ country ]] get [[ discount.discount_pc ]]% OFF on all books & courses with code [[ discount.coupon_code ]]Using a QRC file
To use a .qrc file in your application you first need to compile it to Python. PySide comes with a command line tool to do this, which takes a .qrc file as input and outputs a Python file containing the compiled data. This can then be imported into your app as for any other Python file or module.
To compile our resources.qrc file to a Python file named resources.py we can use:
pyside2-rcc resources.qrc -o resources.py
To use the resource file in our application we need to make a few small changes. Firstly, we need to import resources at the top of our app, to load the resources into the Qt resource system, and then secondly we need to update the path to the icon file to use the resource path format as follows:
The prefix :/ indicates that this is a resource path. The first name "icons" is the prefix namespace and the filename is taken from the file alias, both as defined in our resources.qrc file.
The updated application is shown below.
import sys

from PySide2 import QtGui, QtWidgets

import resources

class MainWindow(QtWidgets.QMainWindow):
    def __init__(self):
        super().__init__()

        self.setWindowTitle("Hello World")
        self.button = QtWidgets.QPushButton("My button")

        icon = QtGui.QIcon(":/icons/penguin.png")
        self.button.setIcon(icon)
        self.button.clicked.connect(self.change_icon)

        self.setCentralWidget(self.button)

        self.show()

    def change_icon(self):
        icon = QtGui.QIcon(":/icons/monkey.png")
        self.button.setIcon(icon)


app = QtWidgets.QApplication(sys.argv)
w = MainWindow()
app.exec_()
If you run this now, it will look exactly as before, but now the icons are being loaded from the resources.py compile resource file.
![]() Icons visible, loading from the QRC file.
Icons visible, loading from the QRC file.
Resources in Qt Designer and Qt Creator
While it's fairly straightforward to manage your resources by editing the QRC file directly, Qt Designer can also be used to edit the resource library. This allows you to see all the icons (and other data) visually, rearrange them and edit them by drag-and-drop.
Adding Resources in Qt Designer
If you're using the standalone Qt Designer, the resource browser is available as a dockable widget, visible in the bottom right by default. If the Resource Browser is hidden you can show it through the "View" menu on the toolbar.
To add, edit and remove resource files click on the pencil icon in the Resource browser panel. This will open the resource editor.
 Standalone Qt Designer view
In the resource editor view you can open an existing resource file by clicking on the document folder icon (middle icon) on the bottom left.
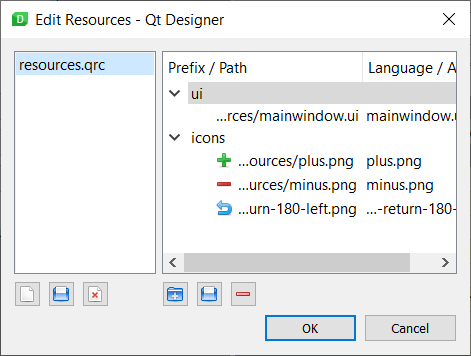 Edit Resources in Qt Designer
On the left hand panel you can also create and delete resource files from your UI. While on the right you can create new prefixes, add files to the prefix and delete items. Changes to the resource file are saved automatically.
Adding Resources in Qt Creator
In order to be able to add icons using the Qt Resource system from within Qt Creator you need to have an active Qt Project, and add both your UI and resource files to it.
If you don't have a Qt Creator project set up you can create one in your existing source folder. Qt Creator will prompt before overwriting any of your files. Click on "+ New", choose "Qt for Python - Empty" for project type. Select the folder above your source folder for "Create in", and provide the name of your source folder as the project name. You can delete any files created, except the .pyproject which holds the project settings.
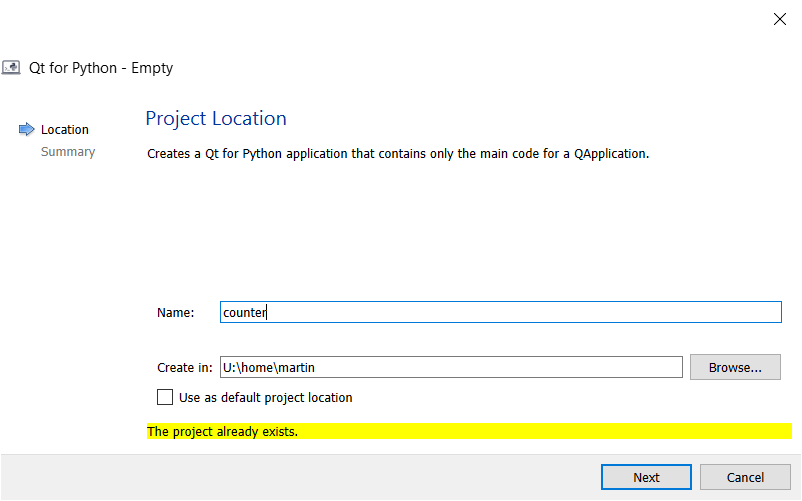 Select the location
To add resources to your existing project, select the "Edit" view on the left hand panel. You will see a file tree browser in the left hand panel. Right-click on the folder and choose "Add existing files…" and add your existing .qrc file to the project.
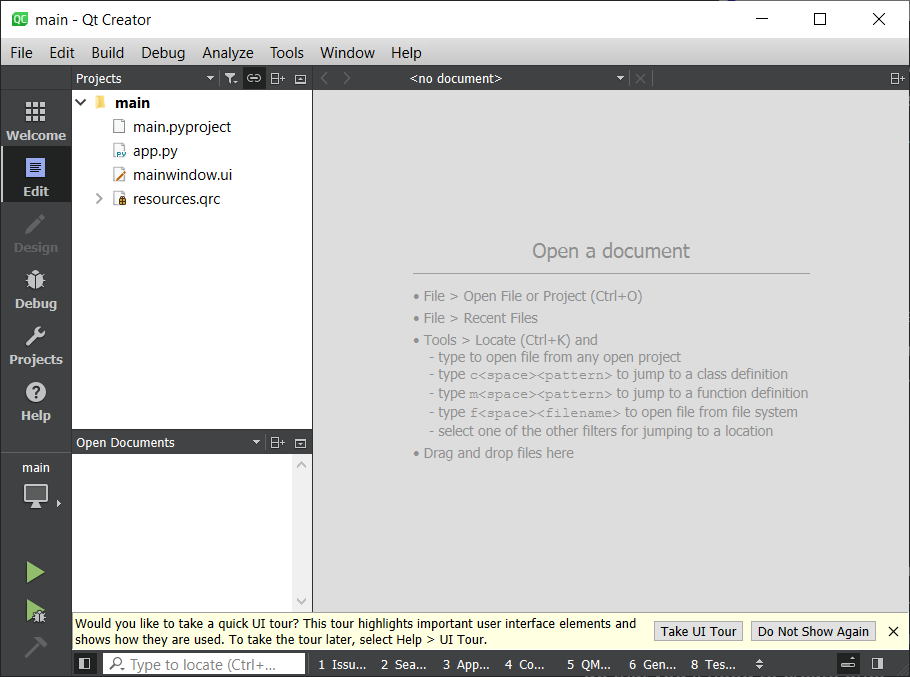 The Edit view, showing the added files
The UI doesn't update when you add/remove things here, this seems to be a bug in Qt Creator. If you close and re-open Qt Creator the files will be there.
Once you have added the QRC file to the file listing you should be able to expand the file as if it were a folder, and browser the resources within. You can also add and remove resources using this interface.
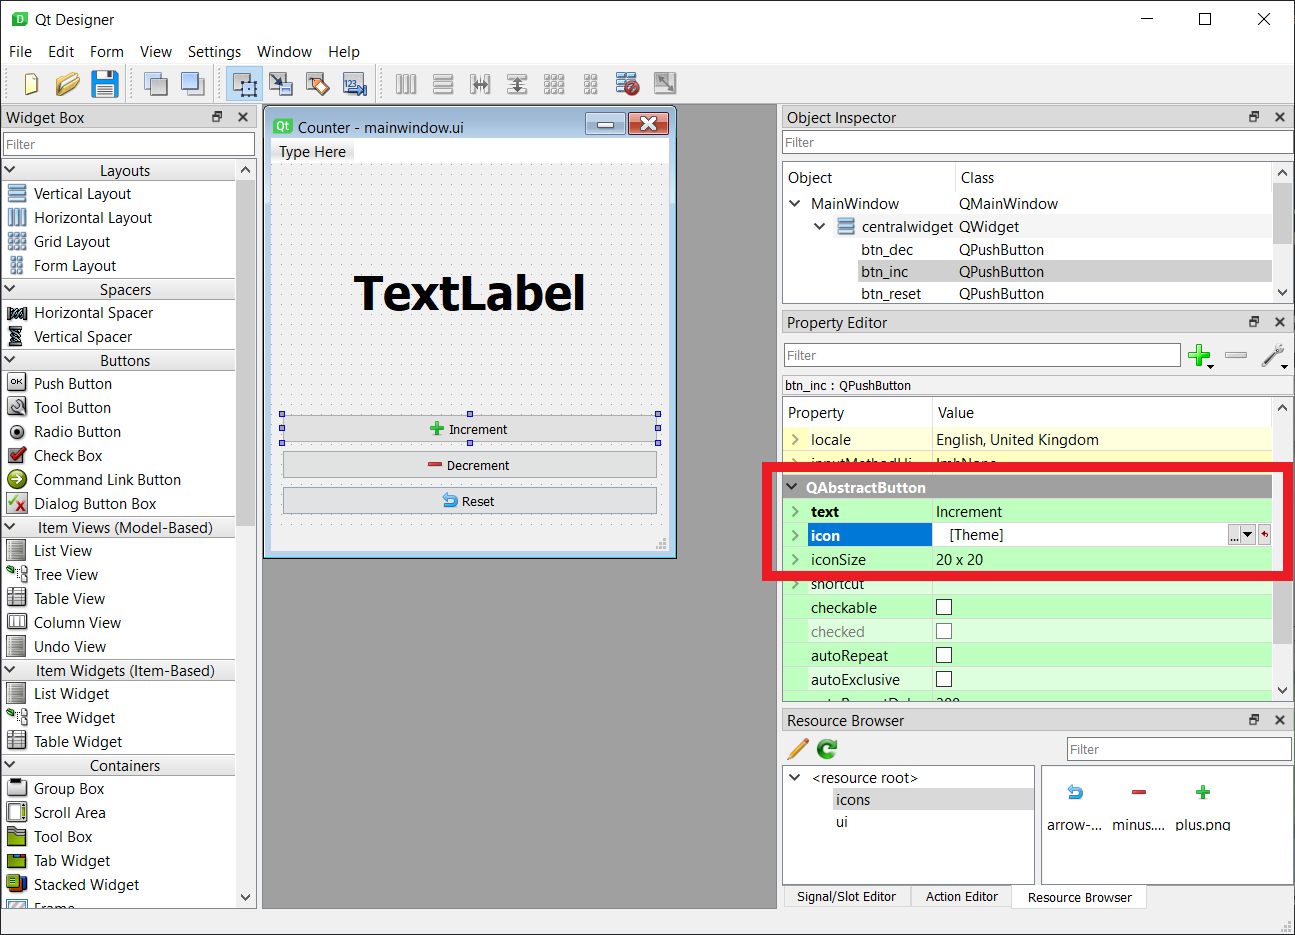
Using resources in Qt Creator and Qt Designer
Once the Resource file is loaded you will be able to access it from the designer properties. The screenshot below shows the Designer with our counter app open, and the increment button selected. The icon for the button can be chosen by clicking the small black down arrow and selecting "Choose Resource…"
 Select the location
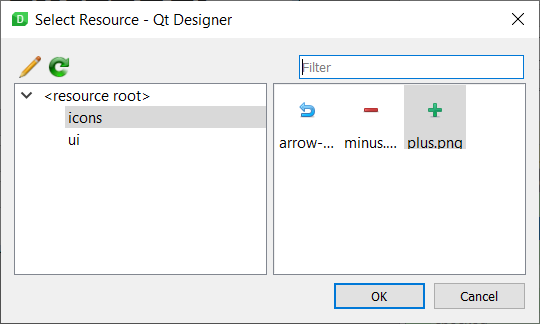
The Resource chooser window that appears allows you to pick icons from the resource file(s) in the project to use in your UI.
 Select the location
Selecting the icons from the resource file in this way ensures that they will always work, as long as you compile and bundle the compiled resource file with your app.
Using a QRC file with compiled UI files
If you're designing your UIs in Qt Designer and compiling the resulting UI file to Python, then UI compiler automatically adds imports to a compiled version of your Qt Resource file for you. For example, if you run the following --
pyside2-uic mainwindow.ui -o MainWindow.py
This build process also adds imports to MainWindow.py for the compiled version of the resources using in the UI, in our case resources.qrc. This means you do not need to import the resources separately into your app. However, we still need to build them, and use the specific name that is used for the import in MainWindow.py, here resources_rc.
pyside2-rcc resources.qrc -o resources_rc.py
The command line tools follow the pattern <resource name>_rc.py when adding imports for the resource file, so you will need to follow this when compiling resources yourself. You can check your compiled UI file (e.g. MainWindow.py) to double check the name of the import if you have problems.
When to use QResource?
You may be wondering when (or even whether) you should use the QResource system.
The main advantage comes when packaging and distributing your applications. Because your data is bundled with the Python source code, you eliminate all the potential path problems and guarantee your data files will be accessible to your app. You can also use Qt Designer to manage and group icons for your application. The downside of course is you need to re-compile your resources any time you add/remove new resources.
Whether this trade-off is worth it for your project is up to you, but if you plan to distribute your application to other people it almost always is.
Create GUI Applications with Python & Qt5 by Martin Fitzpatrick — (PySide2 Edition) The hands-on guide to making apps with Python — Over 10,000 copies sold!
